Securing Spaces: Unveiling the Diverse Functions of Fences Beyond Property Lines

Fencing Companies Rock Hill SC is a structure that encloses an area and can include wire, boards, rails or netting. In a criminal context, a fence is an intermediary that buys stolen goods from a thief to sell at a profit.

Fences can also help establish property boundaries. Before constructing a fence, homeowners should locate and mark utility lines.

Security

fence

A fence serves as a physical barrier to prevent criminals from accessing your home or business. Depending on your needs, there are many different security features you can integrate into a fencing system. Some of these include light fixtures, surveillance systems, closed-circuit television, manned observation posts, and reinforcements against vehicle penetration. Some fence systems can even be integrated with an access control system, which allows you to monitor who is entering and leaving your property.

In addition to providing a physical deterrent, fences also help to deter criminal activity by giving the impression that your property is well-protected. When criminals see a fence, they are less likely to break into the property, as they will know that it is not worth the risk of being caught or injured.

Despite the fact that fences are not a good way to secure valuable items, they do provide a ready market for stolen goods. This can incentivize theft, as thieves can turn their stolen goods into cash quickly. This is a common tactic used by organized crime groups to fund their operations, and is why fences can be charged with receiving or possession of stolen property.

The best fence for security will depend on the level of protection you need, as well as your budget. Generally, higher quality fences will have more advanced features, but they may also be more expensive. However, a high-quality fence will be more effective and cost-efficient in the long run, as it will be able to deter criminals from breaking into your property.

One of the most affordable ways to improve your home or business’s security is by installing a fence. This will ensure that nobody can sneak into your property, and will give you peace of mind. A fence will also improve your privacy, which is important if you have children or pets.

There are a variety of security features you can incorporate into your fence, such as locks and keys. Locks will help to keep out unwanted trespassers, and will require special tools to break open. Another option is to use a barrel bolt, which has a barrel-shaped nut on the end of a bolt that slides into a tunnel on the gate. This type of lock is more complicated than a padlock, and is therefore more difficult to break into.

Privacy

Many homeowners want to make their outdoor space feel like a natural extension of their indoor living area, and privacy is a huge part of that feeling. A fence can block the view of your backyard from neighbors, and it can also keep people from peeking over or under to spy on you in your garden or pool. Depending on the height of your fence, it may even shield you from noise pollution coming from nearby homes or businesses.

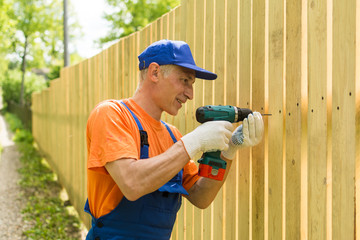
There are a variety of options for privacy fencing, from solid panels to lattice and Victorian-inspired designs. If you opt for a wood fence, it can be stained or painted to match your landscaping and home color scheme. In addition to its aesthetic appeal, wood fences are durable and weather-resistant. Vinyl and aluminum fences offer a more modern look, but they may be less durable than wood.

Regardless of the material you choose, it is important to ensure that your fence has high enough walls to prevent neighbors from peering over or poking their heads in, and that the materials are thick and opaque. Choosing the right materials can also help with noise reduction. If you live in a busy neighborhood or near a school, a metal or chain link fence might not be the best option for privacy, as noise can easily pass through them.

Some fences also come with gates that can be locked or secured, preventing unwanted visitors from entering your property. This feature is particularly helpful if you have children, pets or gardening on your property and want to ensure that they are safe. It is also a good idea for business owners to incorporate gate security into their commercial fencing.

A well-maintained privacy fence can add significant value to your home, so if you ever decide to sell, it will be attractive to potential buyers. In fact, a privacy fence may increase your property’s value by up to 25%, according to Progressive. A well-designed and maintained steel privacy fence is a great way to secure your property without sacrificing style.

Weed Control

Weeds compete with crop plants for water, nutrients and light. If they are not controlled, they reduce crop yield and increase production costs and may harbour insects and diseases that attack crop plants. Control measures include hand weeding, mechanical cultivation, application of chemicals acting as herbicides and a combination of these methods. The timing of these operations should be based on the stage of weed growth, the capacity of the equipment used and the stage at which the crop is most sensitive to weed pressure.

Cultivation is a fundamental operation in any field-based weed control system, and is particularly important early in the growing season. However, cultivation is only effective when the machinery is able to be used to control weeds in their most vulnerable stages of growth and when the crop is sufficiently mature to tolerate a disturbance. In addition, a high degree of skill is required to operate the machinery in a way that maximizes effectiveness and minimizes damage to the crop.

Some crops, such as grain and oilseeds, are more susceptible to the effects of weed competition than others. Therefore, these crops require a more aggressive approach to weed control. In these cases, the use of a herbicide can significantly reduce the weed population and improve crop yield. However, some weed species can resist the use of herbicides and will only be controlled by physical methods.

Many weeds are able to establish and spread rapidly because they produce large numbers of seeds. These seeds are then scattered by the wind and can be deposited in fields far from the parent plant. This is especially true of perennial weeds, such as the dandelion or rose-bay willow herb, which have deep taproots and can spread from one area to another.

Several different tactics can be employed to control weeds, with cultural or organic controls being preferable to chemical controls. These involve killing or restricting weeds by various physical means, from manual removal to burning and the use of weed barriers. In addition, certain types of weed suppressant fabrics can be laid over the soil to prevent re-growth of existing weeds and to inhibit establishment of new ones.

Boundaries

A fence can help determine property boundaries. A boundary fence, or division fence, runs along the line between two different lots or parcels of land and is shared by both owners of the property. These fences should be built according to local ordinances to prevent encroachment. If the boundary fence encroaches onto your property, you can ask the neighbor to remove it or hire a surveyor to mark the exact borders of the property. You should also review your deed and other real estate documents to see if the fence is actually located within your yard.

If the fence was put up before your purchase of the property, and the description of the boundary lines in the parcels clause or conveyance plan or transfer plan was vague or not clear enough to make a determination about location on the ground, then it is common to assume that the fence follows the boundary line. However, the position of a fence on or near a boundary line can change over time due to soil movement and other factors. For this reason, it is best to get a property survey done to ensure that the fence is precisely located within your property boundaries and to avoid future disputes with neighbors.

It is important to discuss your property fence plans with the neighbors when you build them and to establish a mutual agreement about who is responsible for what portion of the cost and maintenance of the fence. A written agreement between current neighbors can prevent legal complications when one of you moves or sells the property and the fence no longer marks a shared boundary line.

If the fence straddles a boundary line, most law and local ordinances require that the owners of the properties share the cost and responsibility for the fence’s maintenance and repairs. If this arrangement is not feasible, a written demand letter asking the neighbor to pay his or her portion of the repair bill may be in order. This will prevent the legal principle of boundary by acquiescence from kicking in and possibly giving the neighbor ownership of your property.

Flooring Refinishing – How to Refinish Your Floors Yourself

You can resurface your floors with a traditional varnish or a polyurethane finish. Be sure to use a low-VOC product. For more information, just click the Flooring Middletown NY to proceed or inquire.

Sanding your hardwood floors using medium-grit sandpaper is also a good idea. This will remove dents and nicks in the wood and help the stain or varnish adhere properly.

Hardwood floor refinishing is a complicated job and one that should only be done by a qualified contractor. It requires great skill and knowledge, and using the wrong equipment can result in disastrous results. If you are considering refinishing your hardwood flooring, research the process thoroughly and gather as much information as possible on how to do it properly. A good place to start is by reading some online articles and talking to other people who have completed refinishing projects themselves.

Once you have a clear idea of the process, you can decide whether to hire a professional or try it yourself. Both options are viable, depending on your comfort level and skills. If you are going to attempt a DIY project, make sure to gather the appropriate tools and equipment beforehand. Also, remove all furniture from the area being worked on, as this will prevent damage and keep the work site organized. Also, ensure you have chosen the right stain and varnish for your floor. It’s important to use a quality product that is oil-based, low VOC, and a high-quality brush.

If you are working with natural wood, it’s important to know the color variations that naturally occur between individual boards. These variances will be more apparent after refinishing, and ensuring that the final result matches your expectations is vital. This is why it’s important to take the time to choose the correct stain and test it out on a small sample of your floor before you commit to it.

Another consideration when choosing a stain is whether you prefer a varnish or a wax finish. A varnish is a harder, more durable coating than a wax. It also leaves no color on your floor, while a wax finish does have a subtle hue that can alter the overall appearance of your floors.

Once you’ve sanded your wood floors, allowing them to dry completely before you move the furniture back in is important. Then, apply a couple of coats of your new finish. Typically, this will be either an oil-based or water-based polyurethane, depending on your preference.

Concrete is a common material used in commercial construction and refinishing. It can provide a fresh look for your floors. It consists of aggregate bonded together with a fluid cement. It hardens over time, becoming very durable and strong. It can be polished to a high sheen, stained, or coated with a protective coating. Concrete resurfacing is a quick and inexpensive alternative to removing and replacing damaged flooring materials.

The first step in refinishing concrete is to etch, grind, shoot, and blast the surface to make it porous and then repair any cracks. Clean and priming the floor before applying any new surface is important. Removing any protruding metal pieces is essential as these can cause a hazard. After the surface has been etched and cleaned, it must be sanded with fine-grit sandpaper to smooth it. Using a hand-held power sander for tight spaces and corners is best.

After the sanding process, you can stain your concrete floors. Stains are absorbed into the concrete surface and are more durable than paints, which sit on top of the floor. Stains are available in a wide range of colors and can be custom-mixed for specific projects.

Another option for concrete refinishing is to cover the surface with an epoxy coating. Epoxy coatings are fast-drying and can be installed in a variety of patterns. They can also be tinted in various colors to match your décor.

Consider adding stencils and decorative saw cuts to your floor refinishing project if you want a decorative touch. They will give your refinished floor a unique and sophisticated appearance to impress your customers and clients.

Whether using concrete stain or an epoxy coating, it is important to protect the floor with a sealant. This will protect the floor from dirt, chemicals, and other stains. It will also help with maintenance, making the surface easier to sweep and mop. It’s a good idea to ask your flooring contractor what sealant they recommend for your floor.

Refinishing or resurfacing tile is an affordable way to breathe new life into dated tile floors. This process isn’t just for tile flooring; it can also be used to refresh grout, showers, and even walls.

Before refinishing the tile, it’s important to perform a thorough cleaning. This will remove any dirt, grime, soap scum, or stains that have built up over time. It’s recommended to use a non-acidic cleaner that is safe for your tile type. Once the tiles are clean, it’s a good idea to repair any loose or cracked pieces and allow them to dry completely.

Once the tiles are dry, you must apply a resurfacing product. Several options are available on the market, including a powder that you can mix with water to form a paste or a liquid that can be applied with a brush. It’s best to follow the instructions provided by the manufacturer of your resurfacing product.

When refinishing tile, you’ll want to put down plastic sheeting over the doorways to prevent dust from entering the rest of your home. It’s also good to tape off floor registers and pull up any shoe molding along the wall-floor joint. This will protect the baseboard and make it easier to reinstall once you finish the refinishing job.

If you’re refinishing tile floors, choosing a stain color that will coordinate well with your decor is a good idea. Remember that the stain will be darker than the original color of the floor since refinishing removes some of the wood grain. If you’re unsure what color to choose, ask your flooring professional for advice.

After the resurfacing coating has dried completely, applying a protective sealant to the floor is a good idea. This will help to protect it against moisture, stains, and regular wear and tear, extending the lifespan of your refinishing job. This step is especially important if you live in an area with much rain.

Laminate is a popular flooring option for its cost-effectiveness and resilience. However, like all floors, it can suffer from normal wear and tear over time. Fortunately, laminate can be restored through flooring refinishing to restore its elegance. Refinishing wood laminate floors can be done using various methods, which we will explore in this article. However, it should be noted that refinishing laminate is more challenging than refinishing hardwood floors. It requires a certain level of patience and care to get the best results.

Laminate comes in many different designs and styles. It is manufactured in layers, with each layer adding to the durability of the final product. The first layer is the wear layer, a durable coating that protects against scratches, water, and stains. Next is the decorative paper layer, which can be printed to look like real wood or other natural materials. Finally, the core layer combines melamine resin and fiberboard materials that help make the final laminate product sturdy and durable.

During manufacturing, each laminate plank is milled with micron-precise tolerances and cut to specific profile edges. The edges are also glued together with a special adhesive. These features allow the planks to fit together easily and consistently according to one of four locking systems panel profiles. The planks are then sealed with a special protective finish to resist stains, scratches, and other damage.

If a laminate floor has minor scratches, the wear layer can be sanded to remove the scratch and refinish the plank. However, replacing the plank rather than sand and refinishing is better if the laminate has been badly scratched or damaged.

Refinishing a laminate floor with a polyurethane sealant will help to keep the new coat of stain from chipping or peeling. A good quality polyurethane will also guard against the fading of the color caused by prolonged exposure to sunlight.

While it is important to refinish laminate floors, it is also good practice to prevent the need for refinishing by sweeping and mopping regularly and keeping furniture protectors on your chairs and tables to avoid scratches. It would be best if you also considered putting doormats in entryways to catch dirt before it has the opportunity to get into your home.

Stucco Removal Requires Proper Preparation and Safety Measures

Whether you want to renovate your home or are preparing for a sale, it’s important to consider the condition of the stucco walls. Stucco Philadelphia is a labor-intensive project and requires proper preparation and safety measures to complete successfully.

Testing your wall’s condition can save you money, time, and energy in the long run.

The stucco on your home’s exterior provides a durable, decorative, and protective barrier from the elements. It’s also a significant financial investment, so keeping it in good condition is important. It’s also a great place for mildew and mold to thrive, which can cause substantial and expensive damage to the structure. Washing the stucco regularly is one way to prevent these problems, and it’s easy to do without damaging the material. However, before cleaning, it is essential to inspect the wall surface for minor cracks or damage. If you miss them, they could worsen during the washing process and result in water seepage, leading to mold and mildew.

During the inspection process, you should also note the state of the underlying wall and take the necessary steps to repair any damage or areas needing improvement. This step is particularly important if you’re planning to wash your stucco, as it will help ensure that the material is in good condition for the wash process and will resist damage from the pressure washer.

You’ll need various tools and materials to prepare for the stucco removal. Start by covering surfaces you want to avoid getting dust or debris on with tarps or drop cloths. This will protect furniture, fixtures, and any other items in the work area from falling debris or splatters during the process.

Once the walls have been protected, break up the texture using a pneumatic chisel or hammer drill with a chisel blade. This can be challenging and time-consuming, so it’s important to take your time and be careful not to damage the underlying surface. Once the texture is broken up, you can scrape off any loose particles and smooth the surface using a grinder equipped with a diamond blade.

Once you’ve cleaned the wall and repaired any damaged areas, you can apply a new coat of texture to match the existing surface. This is an important step, as it will ensure that the new material is well-blended with the old and creates a uniform appearance. You can add a final coat of paint to the wall to complete the project if desired.

Depending on the scope of your stucco removal project, several tools will need to be available. Having these tools will help ensure that the job is completed quickly, efficiently, and correctly. Using the right tools also helps to ensure that your workers are not creating more problems by damaging the underlying materials as they remove the stucco.

First, workers must prepare the worksite by laying tarps and erecting scaffolding. They will then use a hammer to create a small hole in the stucco and a chisel or crowbar to loosen and break apart the stucco. Suppose they discover severely deteriorated brick underneath the stucco. In that case, they must reassess whether it makes sense to continue the removal or find a local mason to help repair and restore the underlying brick.

If it makes sense to continue removing, a circular saw will remove the stucco. They must be careful not to cut into the underlying wire mesh. Once the stucco is removed, they must use a pry bar and wire cutters to remove any remaining nails stuck in the brick.

Once the walls are free of stucco, they must be cleaned and prepped for patching and repairing. The surface must be scrubbed with a broom or brush to remove any dust or debris from the wall and then dampened with water for better adhesion. If there are cracks or holes in the wall, they must be filled in and then repaired with plaster before improving the surrounding stucco texture.

Stucco is a popular plaster for exterior walls due to its durability and long lifespan. It is also known for adding a unique, attractive style to homes and buildings. If you want to update your building’s look or want a new exterior, removing the stucco texture is an easy way. Following the steps outlined in this article, you can easily strip old stucco and give your building a fresh and updated appearance.

During stucco removal, it is important to follow proper safety measures to avoid injury. The first step is to wear protective equipment, including a mask and goggles, to protect your eyes and respiratory system from dust and debris. Similarly, it is recommended to use gloves and a face guard to protect your skin from the sharp edges of a chisel or scraper. Furthermore, clearing the work area of any furniture or fixtures that could be damaged is necessary. Lastly, proper disposal of leftover materials is important to avoid environmental harm.

If the wall or ceiling contains asbestos, testing this material before beginning the removal process is crucial. If your ceilings are covered in this material, you must hire a professional mason to remove and replace the material. It is also wise to cover any exposed brick with new drywall. If the underlying brick is severely deteriorated, replace it entirely rather than attempt to salvage it through plastering.

It is also recommended to place a tarp beneath the work site to catch falling debris and shorten clean-up time. Using a circular saw with a diamond blade to cut through the stucco is usually more effective than using a hammer and chisel. However, it is possible to achieve similar results by carefully chipping away at the existing texture with a chisel and a crowbar.

When the chiseling and scraping have been completed, washing the walls with a hose sprayer or cleaning solution is recommended. Then, allow the walls to dry thoroughly before repairing any cracks or holes. If your stucco is a lighter color, washing it before applying any paint or cladding is generally best.

Inspecting stucco walls regularly for signs of deterioration or water damage is advisable, as these can lead to more serious problems. For example, if you notice a patch of green algae growing on your stucco, it is a good idea to use a safe cleaning product for outdoor use. This way, you can easily remove the stains without damaging your stucco.

In some cases, black stains appear on the stucco of homes. These can be caused by mildew and algae grown in the porous stucco. The fungi are attracted to damp conditions and organic material like dirt and plant matter. Eventually, they can cause damage to the stucco surface and may also contribute to cracks in the wall. To get rid of these stains, you must first kill the mildew and algae before scrubbing away the residue.

If you are using a pressure washer to clean the walls, be sure that it is set to low pressure and that you are standing a safe distance from the wall. Using a high-pressure setting can damage the stucco surface and lead to cracks in the wall.

Begin by pre-wetting the stained area of your stucco home with water to draw the stains to the surface. Then, saturate the section with a cleaning solution. Let the solution sit for five to ten minutes. You should spray the section lightly with water once or twice during this time. This will help to keep the cleaner activated and prevent it from drying too quickly.

After the cleaning solution has had a few minutes to soak in, begin scrubbing the area with your brush and water. Be sure to clean the areas where the stains are most prominent. Rinse the stucco surface again when you are finished scrubbing. Use a lower pressure setting this time, and position the nozzle about 24 inches away from the stucco surface.

Once you have rinsed the surface, it’s important to inspect the walls and look for any cracks or damage that might have occurred during the scrubbing process. Please fill in any cracks that appear before they widen too much, and call a professional for advice if you see anything that looks like it needs some attention.

Stucco is less resilient than vinyl or wood siding, and continuously exposing it to the elements can lead to cracks and rot over time. In addition, if you wash your stucco without carefully inspecting it before and after, you could be blasting dirt and other debris into the house’s interior through any open cracks or crevices in the wall.